


Tunnel In the Middle of Nowhere - Bear Gulch to Sterling Mine to Tunnel Ridge
Bear Gulch to Sterling Mine to Tunnel Ridge

Bear Gulch Trailhead
We start this trail at the Bear Gulch trailhead, south of Jacksonville. There’s parking here for 7-10 cars, but when I was there in mid-October on a Friday, mine was the only car there all day.
The Bear Gulch trail connects to the Sterling Mine Ditch trail system. You can easily turn this 5 mile hike into a much longer one, or, as you’ll see later, a shorter hike if you prefer. The shorter version is a little steeper and you don’t get to walk along 150 year history.

Elevation gain is 700 feet, you’ll be walking along a single track pack dirt trail and while the drive here is only about 25 miles from Medford, the last several miles is a gravel and dirt track so you’ll be going slower than on a paved road.
Along the way you’ll encounter a two or three downed trees, one of which I removed some branches from to make passage easier. None of them are difficult to get around.
As you hike along in the lower elevations, you’re going to be in a white oak and ponderosa forest. There’s very little brush alongside the trail here, but later the bushes encroach on the path a little, so I recommend tick spray for your legs, clothes and gear.

I love hiking in the autumn, mornings are crisp, the sound of crunching leaves, the smell of the forest, leaves turning red, orange and gold. Truly beautiful.
Eventually, the sun crested over the hills and that morning crispness became warm and eventually hot. I brought three liters of water, but should have brought four.
While this trail doesn’t have the grand views of trails like Observation Peak, Hyatt Lookout, Mt. Ashland or Grizzly Peak, it still provides some beautiful views of the hills.

At some point, these two trees are going to end up on the trail. That’s why I pack a folding saw as you’ll see later.
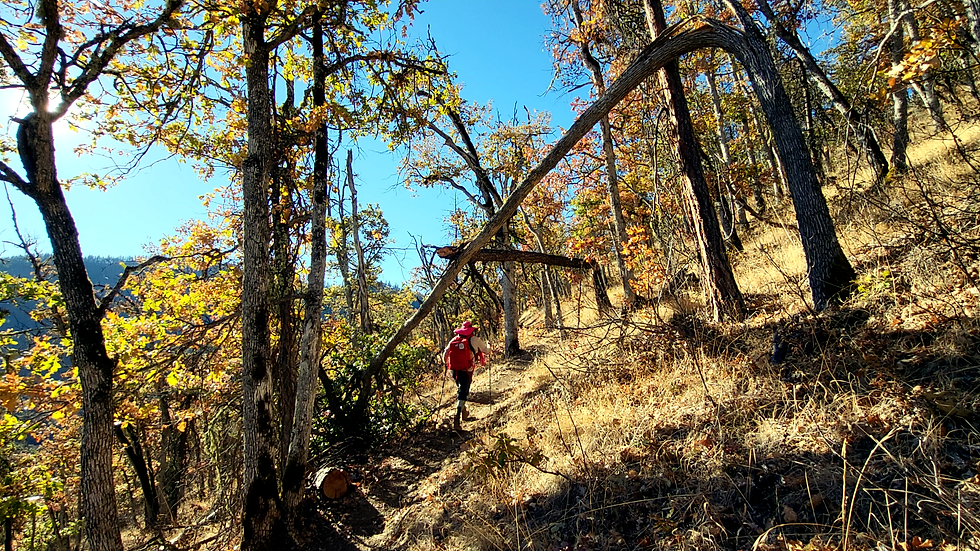
Bear Gulch to Sterling Mine Trail
Just past a mile and a half, the Bear Gulch trail connects to the Sterling Mine trail. You’ll want to go right here and for the next two miles you’re going to be hiking a very easy, level path alongside a ditch dug into the hillside.

As I mentioned earlier, this isn’t necessarily a destination hike for spectacular mountain panoramas, but it offers an appealing combination of natural scenery, a little exercise, and the satisfaction of finding somewhere less familiar. This is a hike for people who enjoy exploring quieter trails, wandering through oak woodland, and discovering the historic Sterling Mine Ditch trail system.
The real attraction here is the combination of natural scenery and a fascinating piece of Southern Oregon's mining history. You aren't simply walking through the woods: you're following traces of an ambitious 150 year old engineering project that helped shape the local landscape.

Let me explain.
Sterling Mine and Tunnel History
We need to wind the clock back to the mid-19th century. Southern Oregon was gripped by gold fever following strikes in places like Jacksonville and Sterlingville (a booming, now-vanished mining town down in the Applegate watershed).
Extracting gold through hydraulic mining required an immense, consistent volume of water under high pressure. To solve this, miners undertook monumental engineering feats, digging an intricate network of hand-dug ditches that stretched for dozens of miles along the mountainsides to siphon water from higher elevations down to the mining claims.
The crown jewel of these efforts was the Sterling Mine Ditch, completed in the late 1870s (specifically around 1877–1878). Stretching over 26 miles, the ditch transported water from the Little Applegate River all the way to the hydraulic mines of Sterling Creek.
As the Sterling Mine Ditch contour-lined the steep, rugged mountainsides south of Jacksonville, it occasionally hit sharp, protruding ridges. Surveyors and miners faced a choice: they could either engineer the ditch on a dizzying, expensive wooden flume all the way around the outside curve of the ridge, or they could punch straight through it.
At Tunnel Ridge, they chose the latter.
Miners and laborers—using hand tools, black powder, and backbreaking work —bored a tunnel straight through the rock wall to act as a shortcut for the water channel. Instead of looping the water around the long contour of the ridge, the ditch entered the hillside on one side and popped out cleanly on the other, keeping the grade steady and shortening the system's overall length.
Sterling Mine Trail
This ancient Madrona tree is one of the most impressive of its kind I’ve seen in southern Oregon. I know no one reading this would ever carve something like this into a tree, but if for some reason you ever feel like carving something into a tree, don’t.

<picture of a circle with lines making multiple triangles within it carved into a madrona tree>

Along the way to the tunnel I found this tree that had toppled over the trail and while I didn’t have a saw big enough to cut the tree, I could at least get the branches out of the way to make the passage easier.

You’ll find a couple of these retaining walls like these where the men building the ditch couldn’t dig into the hillside and so had to create a retaining wall to continue the ditch.
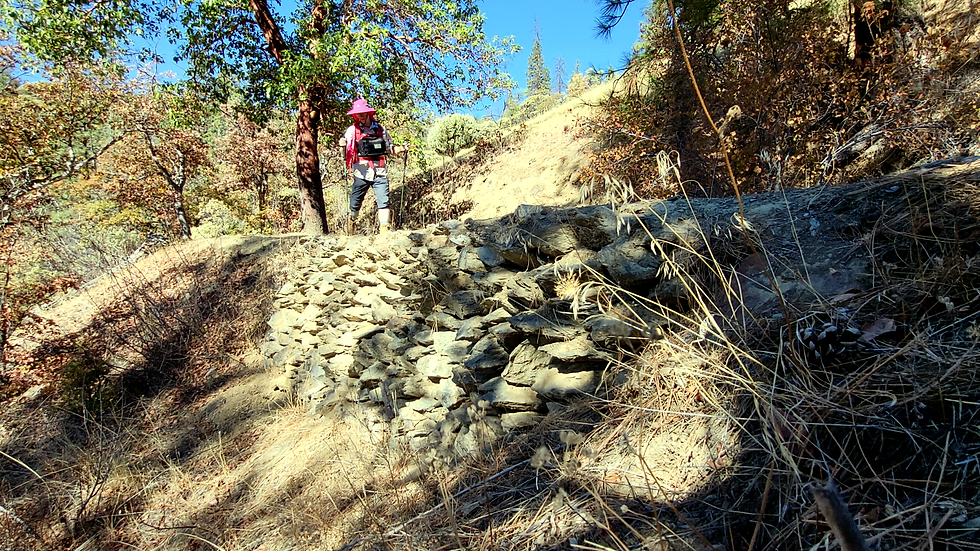
I recommend taking advantage of this bench next to this massive fallen tree, (there’s three benches in all from the Bear Gulch trailhead to the Tunnel Ridge trailhead) to relax and take in the view for a little while.

The Tunnel
OK, here’s the tunnel I told you about. The entrance and exit are narrow, and I recommend bringing a flashlight, wearing trousers and stowing you hiking poles before you enter. You’ll have to crawl on your hands and knees going in and coming out of the tunnel. I don’t recommend this tunnel if you have a fear of closed spaces.

Once you’re past the entrance it’s possible to sort of crouch and walk along the tunnel, just watch your head. You can see the light at the end of the tunnel, so it’s not completely black in there.

Emerging from the tunnel you’ll find yourself in a cut made into the hillside. Get you hiking poles out and go right from the tunnel.

If crawling on your hands and knees isn’t something you want to do, that’s OK, just walk up the hill from the tunnel entrance.

Both options will bring you to point where the Tunnel Ridge trail connects to the Sterling Mine trail. Follow the sign down the hill to the Tunnel Ridge trailhead.

The walk down to the Tunnel Ridge trailhead is an easy decline. You’ll spend more time exposed so sunblock, a sunhat and sunglasses would be good to bring along.
So, who is this trail best for?
For regular day hikers: a comfortable half-day outing, good for breaking in new boots, packs or trying out new gear.
For occasional hikers: achievable if you take your time, wear suitable footwear and are comfortable walking several miles on dirt surfaces.
For families: potentially a good outing for children who are used to hiking, but the climbs, uneven footing and poison oak require attention.
The Tunnel Ridge trail will put you back onto the Little Applegate road, go right and in just a little over half a mile, you’ll be back at the Bear Gulch trailhead.

What Should You Bring on This Hike?
For a hike like this, I'd concentrate on a few practical essentials:
Water: Bring enough for the distance, temperature, and your individual needs. I carried three liters in October and wished I'd brought four.
Hiking footwear: Choose shoes or boots that provide suitable grip and support on dirt, loose ground, and uneven surfaces.
Sun protection: Carry sunscreen, sunglasses, and a sunhat for the more exposed sections.
Tick and poison oak precautions: Use appropriate repellent, avoid brushing against vegetation, and check your clothing and skin afterward.
Flashlight: Essential if you intend to enter the tunnel.
Navigation: Carry a map or reliable offline trail navigation, and pay attention to junctions and trail signs.
Trekking poles: Useful for many hikers on uneven ground, but stow them before crawling through the tunnel.
A small first-aid kit: Useful for treating minor cuts, blisters, and other common trail problems.
If you'd like to see what this trail looks like, and come along with me as I crawl through the tunnel, watch the video on Amputee Outdoors: https://youtu.be/2ugerXSJ8OY


Comments